Rear Wide View
Use the rear wide view to assist in checking the safety of the surrounding area when accelerating from a stop, parking, or stopping the vehicle.
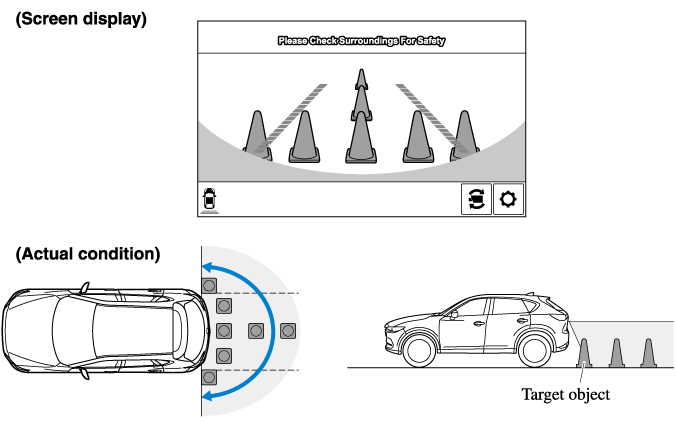
Range of displayed screen image
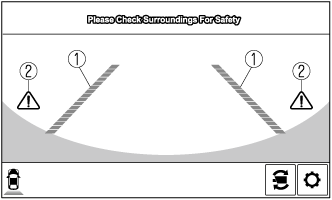
Viewing the screen
|
Display/Icon |
Content |
|
|---|---|---|
 |
Extended vehicle width lines and distance guide lines (red/blue) |
These guide lines indicate the approximate width of the vehicle and distance to a point measured from the rear of the vehicle (from the end of the bumper).
|
 |
Blind Spot Monitoring (BSM) warning lights |
Indicates when the Rear Cross Traffic Alert (RCTA) has operated. For details, refer to Rear Cross Traffic Alert (RCTA). Refer to Rear Cross Traffic Alert (RCTA) (Search). |
-
The parking sensor obstruction detection indication does not display. Switch the screen display to the top view/rear view display if the parking sensor warning sound is activated.
-
The rear wide view screen displays the image at the rear of the vehicle at a wide angle and corrects the image to help detect approaching obstructions from the side. Therefore, it differs from the actual view.