Fuse Replacement
Replacing the fuses on the vehicle's left side
If the electrical system does not work, first inspect the fuses on the vehicle's left side.
-
Make sure the ignition is switched off, and other switches are off.
-
Open the fuse panel cover.
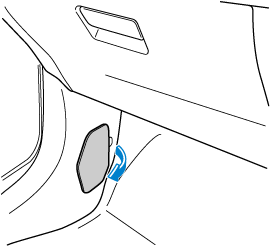
-
Pull the fuse straight out with the fuse puller provided on the fuse block located in the engine compartment.
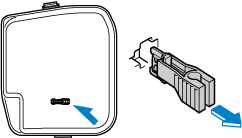
-
Inspect the fuse and replace it if it is blown.
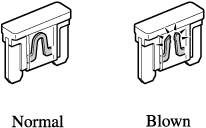
-
Insert a new fuse of the same amperage rating, and make sure it fits tightly. If it does not fit tightly, have an expert install it. We recommend an Authorised Mazda Repairer.
If you have no spare fuses, borrow one of the same rating from a circuit not essential to vehicle operation, such as the AUDIO or OUTLET circuit.
Always replace a fuse with a genuine Mazda fuse or equivalent of the same rating. Otherwise you may damage the electric system.
Close Caution View Caution
-
Reinstall the cover and make sure that it is securely installed.
Replacing the fuses under the bonnet
If the headlights or other electrical components do not work and the fuses in the cabin are normal, inspect the fuse block under the bonnet. If a fuse is blown, it must be replaced. Follow these steps:
-
Make sure the ignition is switched off, and other switches are off.
-
Remove the fuse block cover.
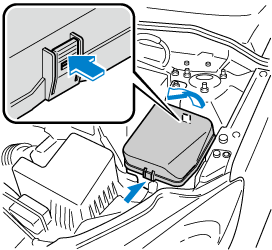
-
If any fuse but the MAIN fuse is blown, replace it with a new one of the same amperage rating.
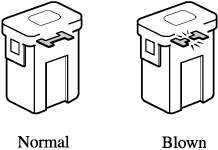
Do not replace the main fuse and multiplex slow blow fuse by yourself. Have an Authorised Mazda Repairer perform the replacement:
Replacing these fuses by yourself is dangerous because they are high current fuses. Incorrect replacement could cause an electrical shock or a short circuit resulting in a fire.
Close Warning View Warning
-
Reinstall the cover and make sure that it is securely installed.


 Read this first


