Audio Set [Type A (non-touchscreen)]
Power/Volume/Sound Controls
Clock
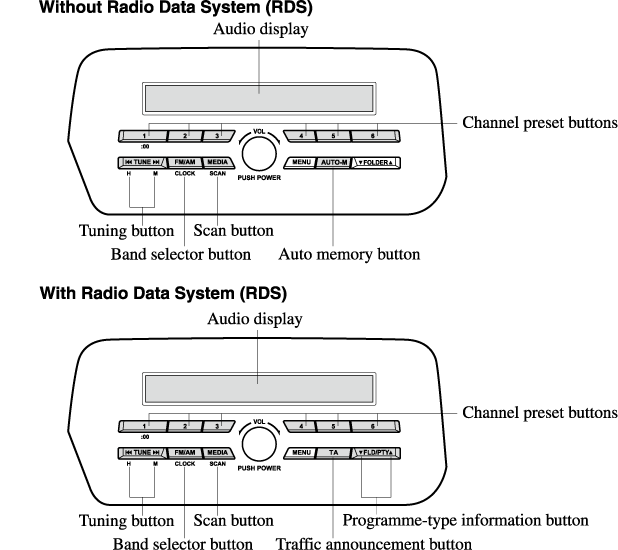
Operating the Radio
Operating the Compact Disc (CD) Player
(Some Models)
How to use AUX mode
How to use USB mode
How to use iPod mode
Error Indications
Bluetooth
®
(Some Models)
Bluetooth
®
Preparation
(Some Models)
Available Language
(Some Models)
Security Setting
(Some Models)
Bluetooth
®
Audio
(Some Models)
Bluetooth
®
Hands-Free
(Some Models)
Voice Recognition
(Some Models)
Voice Recognition Learning Function (Speaker Enrolment)
(Some Models)
Troubleshooting
(Some Models)
Operating the Radio
×
Page top